Wednesday 27 December 2023

Sale-a-bration!

Hello everyone, how are you all doing??

Welcome to Wednesdays blog - I totally missed Sundays, well it was Christmas Eve and we were super busy, with present delivering and going out for meals with family; so maybe I can be forgiven.

I thought, today I would tell you about our forthcoming promotion.  It's called Sale-a-Bration - and it is basically a chance to receive free goods.  Each time you spend £45 you can choose an item from the leaflet for free.  There are packs of 12" x 12" design series paper, stamp sets, ribbon, embossing folders and dies.  So it is well worth having a look through any of our currrent catalogues; whether that's the current annual catalogue, the online only items, clearance rack or our new Mini catalogue to see if there is anything that tickles your fancy! 

Sale-a-bration runs from 4th January until the 29th February 2024.  So you will be able to earn lots of free goodies. Unfortunately I'm not able to show you the inside of the catalogue yet.  But I can send you one!  If you would like to recieve a new Mini Catalogue and the Sale-a-bration leaflet - you can request one by emailing me at nuttyhazecrafts@gmail.com 

Along with Sale-a-bration we have the launch of the new mini catalogue on the 4th January.  This catalogue is filled with all things spring, valentines and new year, some of the stamp sets and dies co-ordinate with the designer series paper in the Sale-a-bration catalogue.


Please do email me if you would like a copy of this catalogue.  I would be more than happy to send you one.

Happy crafting!

Hazel Anne x


Thursday 21 December 2023

Cased Cards

 Hello everyone, how are you all doing??

I am feeling quite humble, as my friend and Stampin' UP! team leader Heather Forgan of https://stampwithnellie.com has today shared a card she CASEd from one of my tutorials.  I have for a while been CASEing other peoples cards, but I never thought anyone would be casing me.  

CASE - Copy and Share Everything or Copy and Selectively Edit - is often a good thing to do if you are short on ideas.  It is something I often find myself doing.

A card I recently cased was a lovely card I received from Mhairi Roberts.  The card was an interesting fold - not sure what its called, but I just loved the way it fitted into a normal C6 envelope.


The two side panels both folded behind the front panel, which meant it would easily fit into a normal envelope.  

To make this card you will need; two pieces of cardstock 9" x 4".  Scorded on the long side at 2", 4" and 6".  These two pieces then needed to be folded so that a mountain and two valley folds are created.  Two pieces of 4" x 4" will also be needed - one of which should be folded in half.

To join all the pieces together the flat piece of 4" x 4" should have both the long pieces attached at the back and then the folded 4 x 4 piece should be fixed over the top of these.  Like this:

Then you will need to decorate all the visible panels in your choice of dsp.  For the cards I made I have used, Feels like Frost (retired) and Countryside Inn.  It is a quick, easy, yet effective fancy fold.  Why don't you give it a try?


I hope you like my cards  today.  Don't forget you can purchase products from my Stampin' Up! shop by going to www.stampinup.uk and entering my current host code GX7BYSGD.

Happy crafting!

Hazel Anne x 

Sunday 17 December 2023

Beary Christmas!

 Hello everyone, how are you all doing??

Well I'm still making Christmas cards - and I am definitely not feeling very Christmassy at all.  I can not put my finger on it, but somehow it just does not feel right.

Anyway as part of my Starter pack I bought myself the lovely (and extremely useful) Beary Christmas memories and more cards (162027) and the matching cards and envelopes (162028) - which are both retiring soon, but are currently still available in the Last Chance products.

 
My first few cards I made with the Memories and more cards were very simple; I just took a card and popped it onto a cardbase, splattered it with Wink of Stella, added an embellishment or two and that was it, all done! 


I then decided to make the cards a little more complex by cutting up the memories and more cards and adding different card bases. 
 
Firstly I took a Night of Navy card base measuring 5 7/8" X 8 1/4" scored and folded it at 4 1/8", then I took one of the card bases out of the pack and trimmed it so that it matted onto the card base.  Then I took one of the memories and more cards and cut it up so that it was in 3 pieces and had a nice border all around the sides. 

I think this makes the beautiful picture pop even more.

For my second card I took one of the more patterned memories and more cards cut it into two pieces, adherred the bottom portion onto a misty moonlight card base.  I then fussy cut a few presents from the off cut, placed these on the top of the card.  I then took a cute seal sticker, from the sticker sheet, and added this into the gap I had created.  Again I splattered it with wink of stella, to give that extra sparkle.
 
I hope you like my cards, and will give them a try.  All items I used are still currently available from my on-line shop.  Please search www.stampinup.uk and pop in my current host code GX7BYSGD that should find me.  I would love to be your demonstrator. 
 
Happy crafting!
 
Hazel Anne xx


Wednesday 13 December 2023

Pinecones Creative Colour Challenge #119

Hello everyone, how are you all doing?

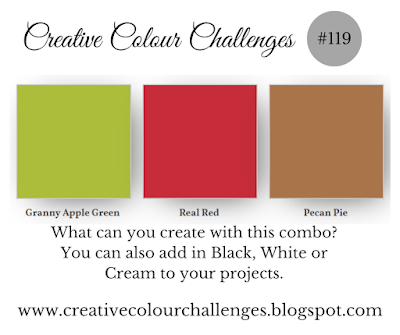
This weeks Creative Colour Challenge #119 over on  www.creativecolourchallenges.blogspot.com is a lovely mix of colours. 


However, when I first saw them, I thought how can I use those on a Christmas card.  My friend Heather came to the rescue, when she said "Holly, berries and pinecones".

As I had no Real Red ink, I quickly abandomed the idea of Holly Berries - I particularly wanted this week to make a card using only simple stamping.  

Fortunately I had the other two colours; granny apple green and pecan pie in ink so I decided to use the pine cones and ferns from a couple of stamp sets.  I used Merriest moments (156353) - currently in the clearance rack - and Christmas season from last years main catalogue, it has no sentiments, but is so versatile.  This years Precious Pinecones, would work  just as well. 

I stamped the ferns, in first and second generation granny apple green leaving space for the pinecones.  I used the sentiment from Merriest Moments, and stamped that in pecan pie.  I popped my stamped piece onto a matt of real red, added a real red bow and some white sparkle gems - and hey presto, all finished.

I like this card, particularly for its stamped simplicity.  What do you think?

We have 24hours FREE shipping as from 11pm tonight.  So why don't you pop along to www.stampinup.uk pop in my Host Code GX7BYSGD, and save yourself some extra pennies.  I would love to be sending you happy mail next month. 

Happy crafting!

Hazel Anne x  

Sunday 10 December 2023

Crafting Pleasure

Hello everyone, how are you all doing??

When I started making cards and paper crafts, it was mainly for family, friends and for something to do in the evenings - so that I wasn't constantly watching TV.  

Initially I watched countless You Tube videos, on paper crafting and all before I found a demonstrator whose style I liked.  I followed with my first purchase from Stampin' Up! and I haven't looked back since.  I have made regular purchases, and have been blown away by the co-ordination of the products - paper, ink and card all completely match, so one really can not go wrong.  Here are a few examples of the superbly co-ordinated products working well together:


Meeting the lovely Heather Forgan of https://stampwithnellie.com opened my eyes to the prospect of entering competitions with my makes.  She intorduced me to the weekly Creative Colour Challenges, and the facebook group "The Joy of Sets" - where we have monthly swaps and challenges.  I have joined many facebook crafty groups since, all of which encourage crafting outside ones own comfort zone. 

I have also recently made and sold my first commisioned card!   I shall be making more cards for commisions, selling more products via my online stampin up shop, and entering my first Blog Hop.

Look out for me!

Happy crafting!

Hazel Anne x   

Wednesday 6 December 2023

Double Column Fancy Fold

 Hello everyone, how are you all doing??

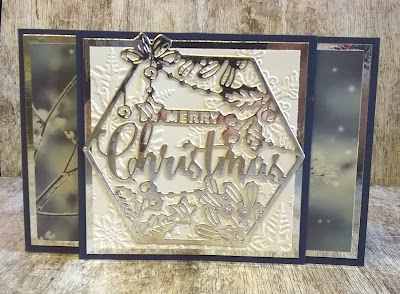
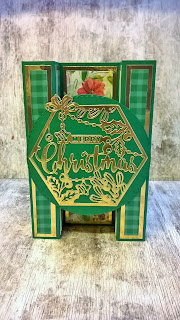
During my last blog, I said I would share with you a smaller version of the double column fancy fold card.  I made this 6 inch by 6 inch card for my dear friends for Christmas. Now they have received it I can show you how I made it. 

From the front 
 
To make this card you will need:  2 pieces of cardstock measuring 6" x 10".  Along the 10" side score at 2", 3", 4", 6", 7", and 8" on both pieces.  You will then need to fold and burnish each piece so that you have a mountain, mountain, valley, valley, mountain, mountain - like this;
Next, the two pieces need to be glued together.  Glue them so that the two flat 2" pieces in the middle are touching back to back.  The side 2" pieces then need to be glued so that the joins are at the back of the card.  Like this:
This is the basic card shape.  Now for the decoration.

 
Depending on the size of the borders you like, you will need 4 pieces of card of your choice, (I used silver glimmer) as the mat layer each measuring 1 3/4" x 5 3/4".  You will then need 4 pieces of dsp (design series paper) each measuring 1 1/2" x 5 1/2".  Go ahead and stick the mats and layers together, and then pop them back, front and both ends.

To finish the main decoration you will need 8 mat layers 5 3/4" x 3/4", and 8 dsp layers 5 1/2" x 1/2". Pop these all around so that the 8  1" panels are covered.
Card is now basically finished.  The finishing touches are a Topper on the front that spands across the card, and a panel for your greeting that spans the back.  These need to be adherred at the very sides so that the card will fold flat.


I hope you have enjoyed todays tutorial and that you have been able to follow along.  Don't forget to comment below, and if you would like a catalogue please let me know either on here or on my facebook page Nutty Haze Crafts. 
 
Happy crafting!
 
Hazel Anne x 

Sunday 3 December 2023

Fancy Folds!

 Hello everyone, how are you all doing?

Since I started crafting a couple of years ago, I have been fascinated by Fancy Fold cards.  I love the way they just fold flat and then suddenly appear to be three dimensional.

Because I have loved them so much I have been inspired to give them a go.  Initially before I found Stampin' Up! it was by Mixed Up Craft and Iced Images, whose cards always appeared to be so complicated. 

Having now watched many tutorials I feel they are not as difficult as I once thought.  Here are a few of the fancy fold cards I have made, starting from the simpler fancy folds to the more difficult.


I have recently even expanded into the realms of triple fold cards, bridge fold cards, and "show stoppers" that literally fill the mantlepiece.  

My recent fancy fold was the double column diamond card, and I have also recreated this in a 6 inch x 6 inch size.  I shall be sharing a full tutorial for this smaller card with you on Wednesday so do pop back then and have a read.  
 
If you would like to purchase any Stampin' Up! products, do please pop into my shop.  All you need to do is go to www.stampinup.uk search for me by name (Hazel Southam-Feeney) and use my current host code GX7BYSGD.  I would love to be sending you Happy Mail next month.
 
Happy crafting!
 
Hazel Anne x 


Inspire Ink Blog Hop - Using Take to the sky DSP

  Hello everyone, how are you all doing?? Today I am joining in with the May Inspire Ink Blog Hop, with some of the talented Pootles Team ...